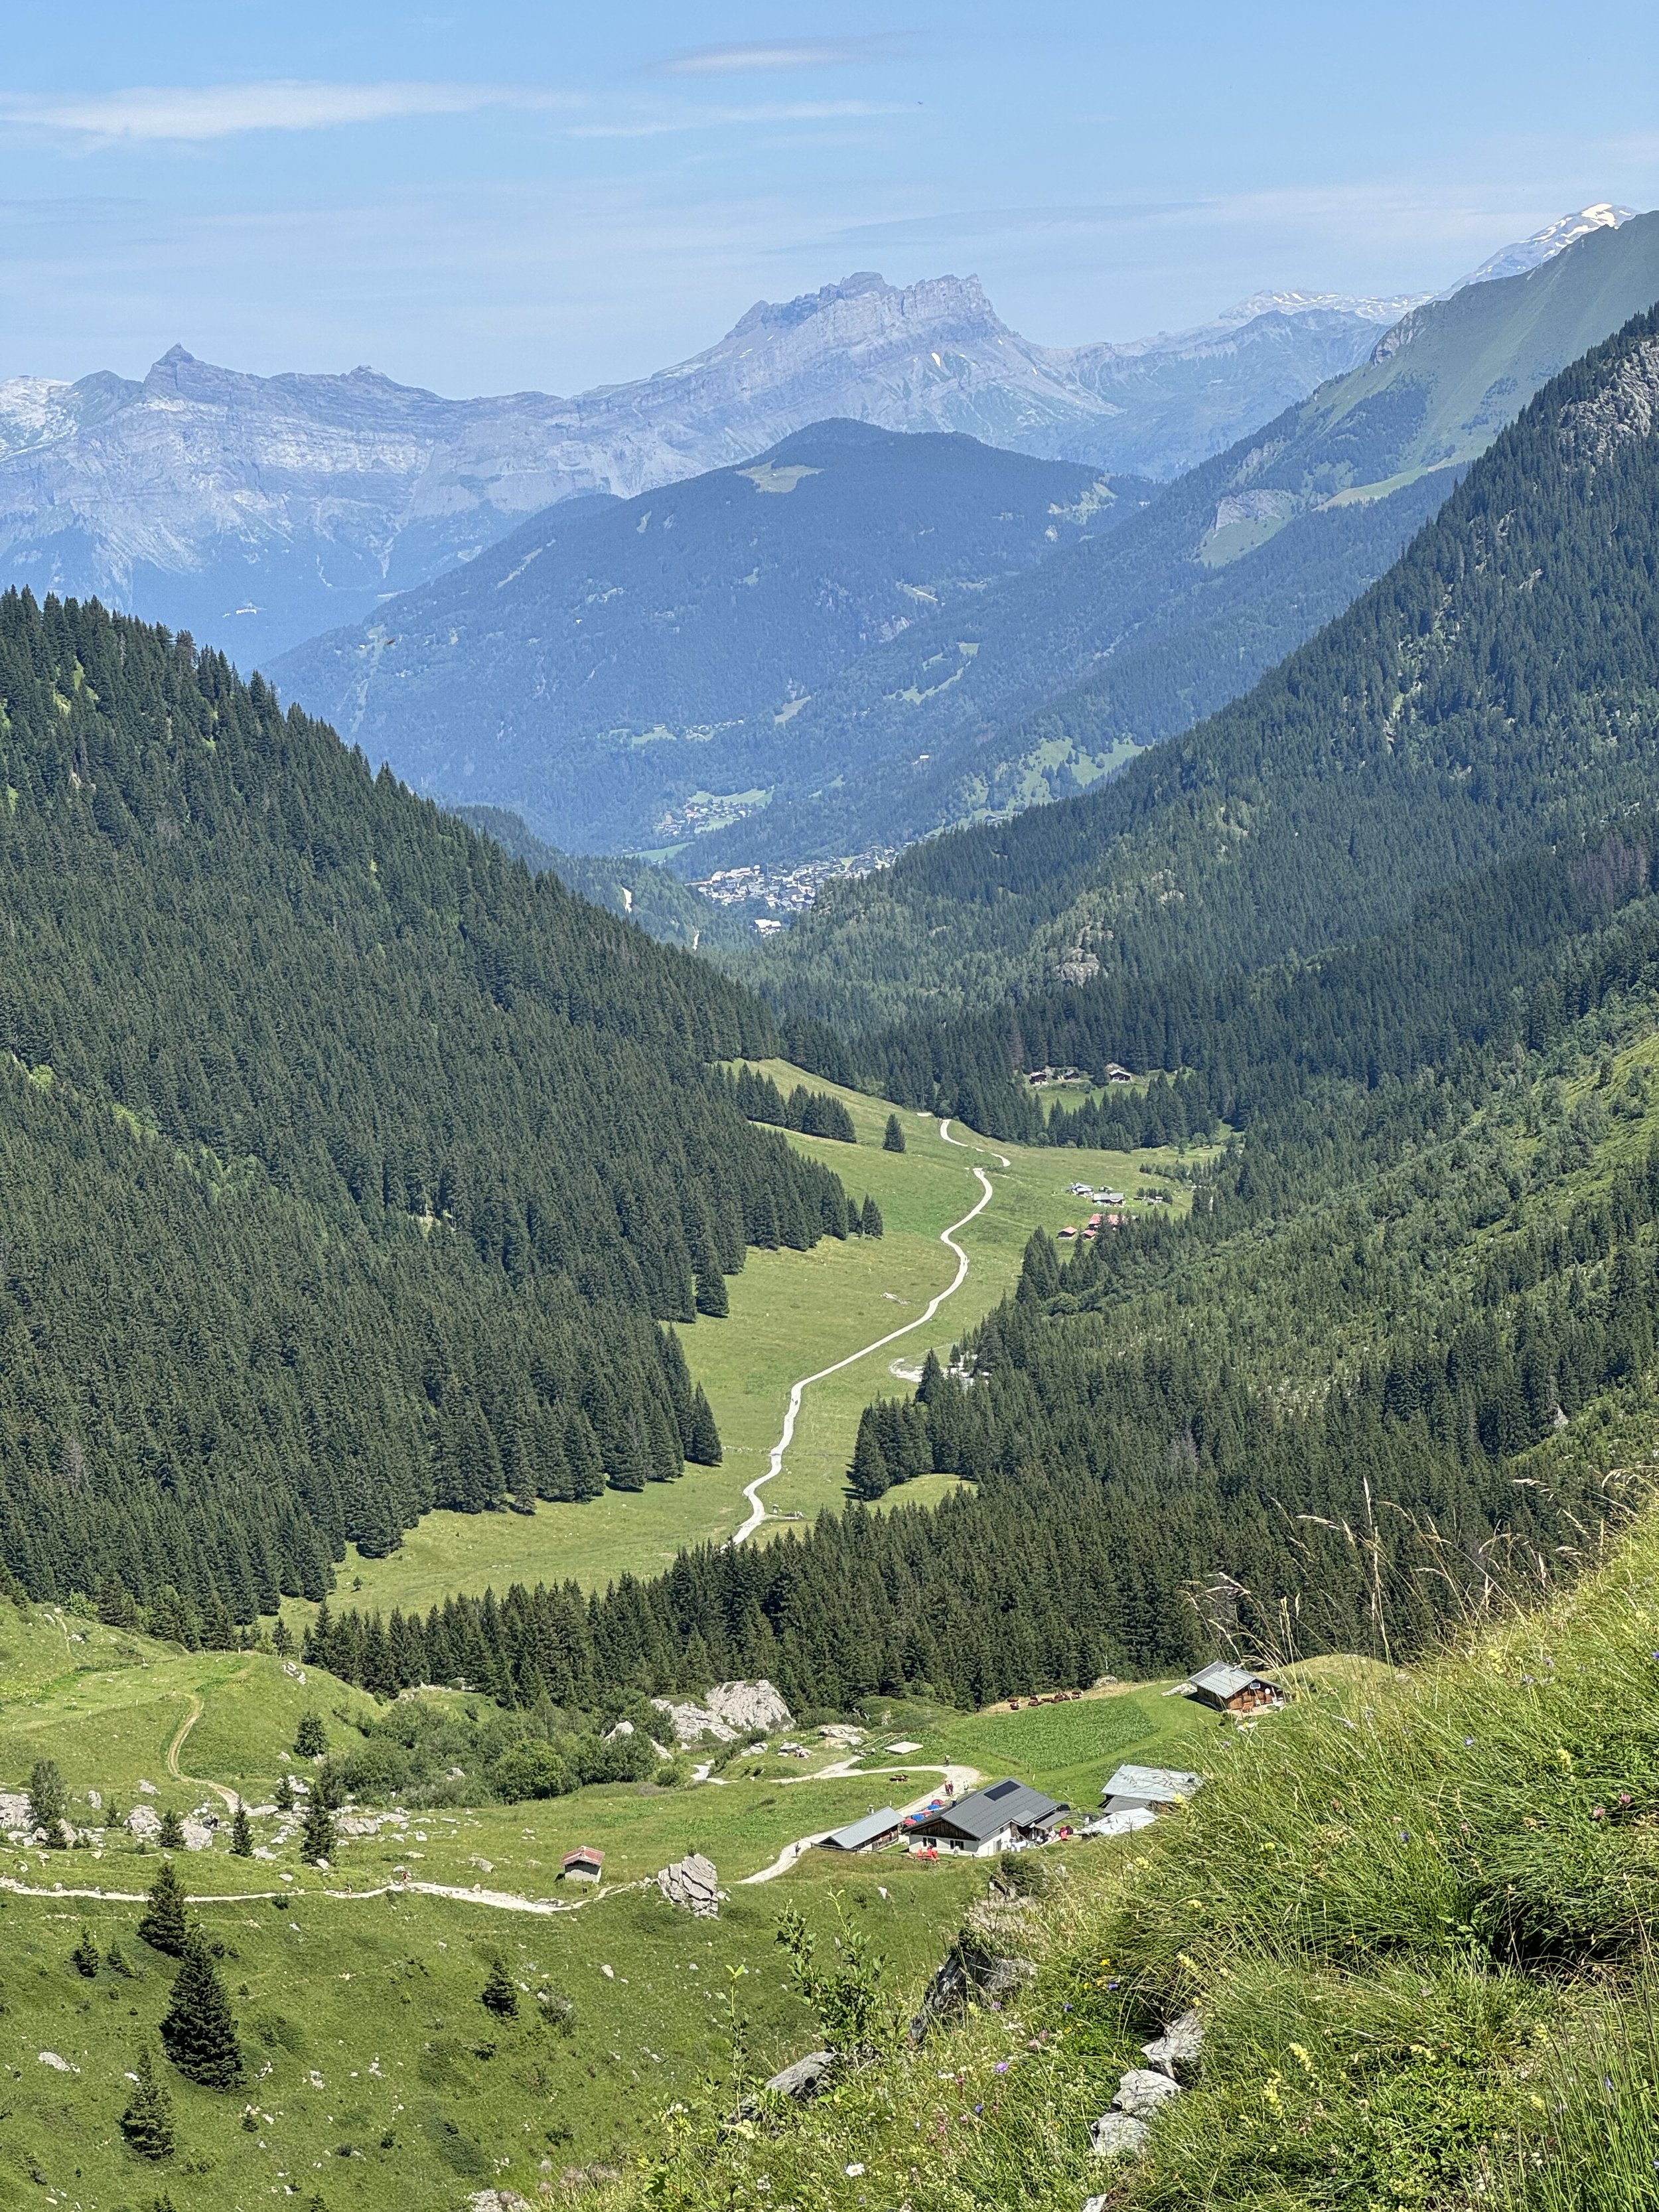
In Boston

I’m in Boston for a few days for a work meeting. When I have traveled for work in the past it’s almost been exclusively overseas, so it was always at least 5 days if not seven or more. This trip is two nights… fly up, meet, come home. Not bad. I would like to make it back up here at some point as a tourist.

When we were landing we swung over the Atlantic and came in from the east and while we were over the ocean the mist coming off the water was interacting with the setting sun in a crazy way. Just wanted to share that.

Kayak progress... power!

Today I had some time to work on the kayak. Last week when I posted I was still trying to figure out where to put the circuit breaker for the main motor circuit. You want it close to the power source, but there really wasn’t a good spot. I looked into some options of trying to create something, but it wasn’t panning out.

Then I discovered that you can buy battery boxes that have a circuit breaker installed in them. This concept was perfect. It was the right size to still fit in the battery well behind the seat, it put the breaker adjacent to the battery, and it gave the battery some protection from water. I ordered one of those and it showed up early in the week. I also had gotten my crimpers and wire strippers in the mail this week, so I had everything I needed.

The battery box with the quick disconnect halves attached.

I moved the mount for the wheels back a bit and that allowed the battery box to fit in. It came with a strap that fit nicely through the bracket to secure it down. Connected the battery to the box circuity and the quick disconnect plug to the terminals on the outside. A strip, crimp, and shrink tube and the connection to power was complete. I have the wire routed through the left side of the kayak inside the hull. The next thing was to cut off some of the wire coming out of the motor and attach the plug on there that matches the outlet I installed last weekend.

Plug that connects the motor to power.

I cut off a decent amount of the wire coming out of the motor, and spliced the plug on. I will say, getting used to exactly where you need to crimp is not the most straightforward thing. At least with the heat shrink tubing, it gives you a little more security. This tubing has a glue inside as well, so once it shrinks that glue melts and makes a nice seal.

Inside kayak splice to motor plug receptacle.

I made the last splice inside the hull which connected the main length of wire coming from the battery to the wires coming off of the receptacle I installed last weekend for the motor plug. (I of course disconnected the battery before doing this as this completes the circuit.) Once this connection was made I went back and reconnected the battery and heard the motor beep. At this point I knew I was close.

I went through the pairing procedure with the remote, and then it was the moment of truth. Would the prop spin?

Success!

I’m very proud of this, which I know is kind of silly. But I really have never done anything like this since building my senior thesis hardware component, and honestly, that just involved some soldering and putting things in a bread board. Compared to what some people have in their kayaks and boats, this is trivial. But I brought it into existence, and that feels pretty damn good.

Still left to do before I can get it in the water:

  1. Make an appointment with TPWD to get the boat registered and get my numbers put on.

  2. I need to get the rack installed on top of my Bronco Sport so that I can actually bring it to water.

  3. Still need to figure out the placement for a few things on the kayak. I know this will evolve over time, but there’s some key things I need to find a place for.

  4. Adjust the pedals for my leg length. This is a pretty straightforward task, but I noticed today the stock position is really close in. They are very easy to adjust, but I need to actually sit in it.

The junk removal folks are coming on Friday, so that will also mean that I should be able to get things rearranged and the kayak holder mounted.

Well that was hard

Today was something else. The short version: we didn’t eat enough and probably didn’t have enough water. All things that can be fixed (former cyclist Taylor is judging current Taylor for making such a rookie mistake). The views were amazing, however. And honestly, I felt pretty great other than the last hour.

The internet isn’t great here, so this will be text only. The hotel we are at is super cute and supper was included which was nice.

This trail is no joke. Tomorrow is more climbing, but more refuges and the last 40% is actually all downhill. I am also going to switch my watch to kilometers instead of miles so that we can have a more accurate notion of where we are using our directions. I will say, the GPS course on the Garmin was great to have. Also, the signage really is amazing. There are times when you are like, really, we go over here? But yes, you do.

I’m also hoping we’ll get a little more acclimated to the altitude every day. Things that looked like nothing hill-wise had us both huffing and puffing.

But with that, I’m going to drink more water, use the theragun to hopefully get my muscles recovering, and get to sleep. Bon nuit!

Here we are...

Well, today is the last day of 2019, and it appears that I didn’t write anything here all year. It was an interesting year for various reasons. Some good, some bad.

I always used to put a picture of Pierre on these posts, but unfortunately we had finally say goodbye to our little old man this year. It was tough - I had had him for 17 years. That’s 17 years of coming home and having him run up to me and say hello. That’s a long time to all of a sudden not see him.

There were good things this year as well. I got glasses. We had a great time going back to Mardi Gras for the first time in years. I went to Kentucky and visited some awesome distilleries with my best friends. We had a wonderful vacation to Sonoma. I am at my lowest weight since 2013, and feel in really good shape to drop below 200lbs in 2020. Carrie and I also ran two half marathons, and I’ve enjoyed running more than I ever have. Lastly, I’ve continued to get better at golf, which has always been a goal of mine.

So while there was sadness this year, there was also joy and hope. Here’s to a great 2020!

2EACBEA1-3A6F-405D-B30E-90057A833960.jpg
B55DF5BC-A70E-4DE3-9858-368D914911B5.jpg
IMG_1672.jpg
IMG_0217.jpg
IMG_0378.jpg
IMG_0097.jpg
FF105FDC-E070-4AF0-AC59-820E1BB29C8A.jpg
55F65BDB-9633-4A66-AAB8-6A14BDC7F0F3.jpg
3237D8C5-C506-419D-BA89-EC818338D34B.jpg

My Introduction to the World of Smoking Meat

One of my goals for the year was to learn how to smoke a brisket. True, wood-fired barbecue is one of the main culinary traditions of Central Texas, especially barbecuing beef brisket. The time had finally come for me to get an offset smoker, a "stick-burner" as they are called, and start this journey into a new cooking genre. Three weeks ago, I (along with some help getting it home from my fellow National Instruments Meat Guild members) acquired an Old Country BBQ Pits Pecos:


I was very excited this about purchase. Given the fact that we got rid of our pickup truck last year, getting a 220 lb 6 ft long smoker home from the store isn't something you can do on a whim.

Heeding the advice from several people, instead of jumping right into brisket, I decided to start with pork shoulder as it is much more forgiving. I was not exactly sure how easy the temperature control would be, and so I didn't want to ruin a quality brisket. So on a Friday I hit up Costco to get a pork shoulder. A few notes: 1) they only come in a two pack, because Costco, and 2) Costco only sells boneless shoulders, which is not the usual. I also picked up a 3-pack of St. Louis style ribs to complete the porky adventure.

Before I could cook in it, however, I wanted to burn off the industrial gunk they coat the inside with, and then reseason the entire thing. 

After letting it burn really hot for a few hours (as well as then practicing my temperature control), I went to sleep decently confident that I could maintain a temperature revolving around 275 for the 8-10 hours this shoulder was going to take. 

The next morning, after getting up early to watch the royal wedding with some friends, it was time to get this pork smoking. I first tied up the shoulder, as the the fact that it is boneless made it somewhat unwieldy and "flappy." I made the rub, which was a simple combination of 2:2:1:1 ratio of Ground Black Pepper:Kosher Salt:Paprika:Garlic Powder. I also gave the shoulder a yellow mustard slather before I put the rub on. On the shoulder went at 9:30 AM:


I set up the smoker according to what seems to be accepted best practice. Started the fire with a chimney of lump charcoal, then through my logs on and got the fire going and the smoker nice and hot. Finally, when I put the pork on I added an aluminum foil pan full of water to help keep the inside of the cooker nice and moist.

I had my remote temperature probe set on the rack right by the shoulder to get a good idea of the air temp right by the meat. I then inserted the second probe into the center of the shoulder. My target was 190° F for the meat. I started the fire with oak, and then used cherry for a while, before switching back to oak eventually. 

There's not much to do while the meat is cooking except sit back, relax, stay out of the sun, and enjoy a beverage.

The pork was coming along nicely, but it wasn't quite ready to wrap in foil. A little while later, I noticed the sheet of fat on top split, and according to Aaron Franklin, that's when it's time to wrap it up (not pictured, as a big foil rectangle didn't seem that interesting). Around this time I did notice the temperature stall as well, which is expected. The foil helps to push through that stall. Around the time I wrapped the shoulder, I through the ribs on. I used a similar rub, but cut down on the salt to get a 2:1:1:1 ratio. The plan was to sauce the ribs after about 2 hours, so I had to make a sauce.

You may be asking why are you making a sauce when there are many, many quality BBQ sauces out there. One word: sugar. I'm not eating sugar and severely limiting my carbs right now (that's water in that Yeti, above, in case you were wondering), and almost all store bought BBQ sauces have a ton of sugar. The sauce was simple. First, chop some onion and saute in about 1 T of butter. Next, add a can of tomato paste and stir until it becomes fragrant and darkens. Finally add 1 cup of apple cider vinegar, and 3/4 cup of water. Now, I did add 2 T of brown sugar, as I was going to be ingesting a very small amount of the sauce (just the amount I put on while cooking), so I figured this little bit of sugar would be insignificant for the actual serving size. I let all that simmer down for a little while, but it never really was thick. I was going for a slightly thinner sauce that would spread nicely when I applied it to the ribs.

I hit my goal temp on the pork at around 8:45 minutes, and pulled it off. I then pulled the ribs off about 30 minutes later. I was pretty impressed with the results:

The pork pulled really easily, and was super juicy. The ribs had a perfect smoke ring, and left clean bones, but they didn't fall off the bone, so it was exactly was I shooting for. I did cook the other two racks the next weekend, and they didn't come out as tender, so I need to keep working on it. But overall, I was happy with the experience.

My temperature control was good, and I learned a lot that first day about keeping the temperature more consistent. I did use full size logs, and most of the people I talk to recommend cutting them in half first, so I will probably try the second shoulder with half logs to try and see if I get even more consistency.

Brisket, here I come!

 
Pierre asks, "So when are you going to smoke some fish, human?"

Baby Back Ribs in the sous vide

I have had good success with the pork shoulder in the sous vide, and I was curious how baby back ribs would turn out. It seemed like it would work without requiring as much time in the sous vide (the shoulder takes a 24 hour dip in the bath). So I used the pork shoulder recipe at chef steps.com as a starting point. (Funny side note, in just looking this up I saw that they actually have a baby back rib recipe. It varies slightly from what I did, so I may have to give this another try.)

I started the rack off with a thick coat of glaze that's a 1:2:4 ration of liquid aminos:liquid smoke:molasses. I do like this rub as it is full of umami and gives it that good smoky flavor without having to own a smoker. (Funny side note 2: liquid smoke isn't creepy. It's an amazingly straightforward product. Alton Brown did an episode of Good Eats where he explained it, so please–no shade.)

I did cut some slices into the ribs to help the glaze penetrate a little more. I had not brined these ribs at all, so I wanted to try and get some seasoning into the meat.

After the ribs were nicely soaked in the glaze, they got bagged up and dunked in the sous vide. (The bigger graduated tub I bought in January came in very handy here.) I put it at 70˚C (158˚F) for 6 hours. It isn't pictured here, but I did cover the water bath with plastic wrap. For a period of that long, and especially with water at that temperature, you are going to get a ton of evaporation if you don't cover the bath.

After their 6 hour stint in the bath, I removed from the bag and dried the ribs off. I put on another coat of glaze. The rub was pretty simple: kosher salt, ground mustard seed, garlic powder, smoked paprika, and black pepper.

Carrie had mentioned that mac and cheese would be perfect with this, so I whipped up a quick batch of that as well. I will do a post about the mac and cheese recipe I came up with soon. It does come out really tasty. To round out the meal I roasted some broccoli. We also opened a 2013 Toulouse Pinot Noir from Anderson Valley. The pinot stood up to the pork perfectly, and it turned out to be a great pairing.

All-in-all it was a great meal with my lovely wife. Eating at restaurants is awesome, but there is something amazingly satisfying about cooking an excellent meal at home. :)